banner

Friday, March 22, 2013

Hand Carders!

Just got my hand carders the other day! I love using them and have gone on a bit of a carding frenzy. Had some extra fiber that I wasn't using, carded that up for the shop. Had some dyed locks and random samples and left overs. Carded those up for me to spin later. I've just been carding and making rolags left and right. :)


Friday, March 15, 2013

Custom Sock Yarn Giveaway!


With spring right around the corner it's time to celebrate! For the remainder of March I will be hosting a sock yarn give away! Each entry will give you a chance to win a custom dyed sock yarn either in a color combination you create or using one of my existing colorway (some existing colorways are one of a kind). The yarn will be a superwash merino nylon blend and will contain about 462 yards of yarny goodness. The giveaway will begin on the 15th of March and go till the 30th of March. There are some examples of my already existing colorways and if you'd like your own custom color the chart below can help you create you special yarn. Remember the more you enter the more likely you will win this lovely yarn. Once the winner has been chosen I'll make an update post on the winner and send along an email congratulation you and to work out the yarn details. Use the Rafflecopter below to enter yourself into the giveaway each gives a little guide to what to do. Good luck to everyone and happy crafting from Tails&Snouts :)


a Rafflecopter giveaway

Thursday, March 14, 2013

Saying Goodbye to the Wild Thing Theory


Over the years of crafting I find that I go through waves of creativity. One month I'll be working solely on knitting or try dyeing everything I could get my hands on. During the early stages of my shop Tails&Snouts I went through a sewing phase. At the time my sister had worked at the local wild life clinic where they received massive amounts of vintage coats. These coats were then used as a mother replacement for the orphaned babies. The wild life clinic is absolutely tiny and had little storage space so they had some extra vintage coats that were given to me. These vintage coats then inspired me to create these cute "monster" plush toys for fun. As usual I went on my creative wave and made large quantities of them. Some days I even managed to make 6 of the plush toys. Since the coats originated for the wild life clinic I've been donating a chunk of the sales to benefit them. Though as my motivation and supply has dwindled I've been making them less and less. As I business I'm trying my best to create a direction for my image, which seems to be turning towards yarns, fiber, and knitting. The Wild Thing Theory has drifted from my business path. They were always a joy to make during my creative moments, but I've found that it's time to let them go. They're goodbye shall help lead me to grow creatively and as a business. If anyone is interested I still have a few left of these one of a kind monster plush toys that would loves some hugs. :)

Wednesday, March 13, 2013

Cute Update: Lamb!


A few weeks ago I had volunteered with my sister to be on lamb watch at the local college's farm. Lamb watch was the night shift for keeping an eye on the pregnant ewes to see if any went into labor. The first night was rather quiet, everyone was rather relaxed so most of the time was spent snuggling with the lambs. On the second night one of the ewes had given birth to 3 little lambs only a few hours before we arrived. Sadly it appeared that the lambs weren't nursing so it was necessary to give a little help. One of the lambs however just couldn't figure out how to nurse. After trying for more then an hour it was determined that someone needed to watch the little guy for the night. Oh boy no one ever tells you how loud lambs could be. It was however amusing when we were taking the lamb away from the barn how all the other ewes began yelling at us, probably calling us baby thieves. For that night my sister and I took turns feeding him every 2 hours or so. He was a lazy nurser, but thankfully the next morning when we brought him back to the barn he magically knew how to nurse. For next month we're expected to rear some baby goats! Fingers crossed that they're be quiet efficient nursing babies.

Saturday, March 9, 2013

Phat Fiber February Box

At the end of last year I happened to come across Phat Fiber on Ravelry. I had heard about it here and there, but had never really looked into it. After a bit of investigation it seemed like an potentially good fit for the shop. Phat Fiber boxes are specifically designed for small indie fiber and yarn shops. Each month you have the opportunity to send in a collection of samples from your shop. These samples are then distributed among boxes to be sold as a form of advertisement. Each of these boxes has a theme where you have the option to base your samples off of. Take for example the first month I participated in the theme was Nordic Culture, which prompted me to create color ways inspired by Vikings and a Norwegian sunrise.

Anyways this past February's theme was everything purple! I only sent in yarn for the month (samples pictured above), but I loved my color combos. I had Violets, which was a simple white, lilac, and deep purple, and Royalties, a pleasant mix of amethyst purple and maroon. Since I sent in 50 of these little yarns I got my own contributors box and just wanted to show the drool worthy samples.

If you want to check out Phat Fiber they're on Ravelry and here's a link to their site.


Sunday, March 3, 2013

Hedgehog Pattern


Hedgehog Pattern

  • 4 US 5 (3.75 mm) DPN
  • 60 yards of worsted weight yarn MC
  • 20 yards of worsted weight yarn CC
  • scissors
  • stuffing
  • tapestry needle
Ears (Make 2)
CO 8 sts in CC join in round
Rnd 1: KFB (16)
Knit every round till it measures about 1/2 inches then BO weave in top end and attach to hedgehog.
Back of Body:
In MC CO 4 sts
Row 1: KFB, K2 , KFB (6)
Row 2: PFB, P4, PFB (8)
Row 3: KFB, K6, KFB (10)
Row 4: PFB, P8, PFB (12)
Work in St st for about 10 rows 2 inches from cast on, end after a purl row.
Decreasing
Row 1: SSK, K8, K2tog (10)
Row 2: P2tog, P6, P2tog (8)
Row 3: SSK, K4, K2tog (6)
Row 4: P2tog, P2, P2tog (4)

Body:
Continued from back of body
Knit the 4 sts on the needle, on same needle, pick up 10 sts around back of body, continuing around till there are 42 sts, 14 per needle
Rnd 1: * KFB, knit to the last st on needle, KFB; repeat for each needle: 16 sts per needle (48)
Repeat Rnd 1 again 18 sts per needle (54)
Knit every round alternation between pulled curl stitch and knit round till about 1 1/2 inches long. May do 1 pulled curl stitch round and 2 knit rounds for less work, doesn't create as full look. Determine the belly of your hedgehog and always knit that needle. To make a curled stitch knit into a st and pull it to about 2 inches long, twist around finger then place back onto needle. Knit normal and curled stitch together.
Decreasing Rnds continue alternating between normal knit and curled stitches
Rnd 1: * K7, k2tog repeat 16 sts per needle (48)
Rnds 2-5: K all (4 rounds total)
Rnd 6: * K6, k2tog repeat 14 sts per needle (42)
Rnd 7: * K5, k2tog repeat 12 sts per needle (36)
Rnd 8: K all
Rnd 9: * K4, k2tog 10 sts per needle (30)
Rnd 10: K all (end on curled round)
Rnd 11: Switch to CC and stop curl stitches K All
Rnd 12: *K2tog, knit to last 2 sts on needle, K2tog repeat 8 sts per needle (24)
Rnd 13-17: K all (5 rnds) Begin stuffing as you go
Rnd 18: *K2tog, knit to last 2 sts on needle, K2tog repeat  6 sts per needle (18)
Rnd 19-21: K All (3 rnds)
Rnd 22: *K2tog, knit to last 2 sts on needle, K2tog repeat 4 sts per needle (12)
Rnd 23: K all
Rnd 24: K2tog all 2 sts per needle (6)
Finish stuffing. Cut the yarn, leaving a long tail. Pull the end through the remaining sts, gather up tight to close the hole, and stitch to secure. Weave the end to the inside and trim. Sew on nose and eyes. This cute fellow comes out to be about 5 1/2 inches long, 3 inches tall, and 3 inches wide.


Friday, March 1, 2013

Free Raindrop Pattern


Have some extra yarn that you don't know what to do with? Try this simple raindrop pattern then! It knits up amazingly quick and needs less than 10 grams of worsted yarn. This pattern can be used to make a cat toy, amigurumi raindrop by adding a cute face, or even part of a baby mobile. It's all up to you so happy knitting :) They come out to be about 3 1/2 inches tall by 1 1/2 inches.

Raindrop Pattern
  • 4 US 5 (3.75 mm) DPN
  • 10 grams of worsted weight yarn
  • scissors
  • stuffing
  • tapestry needle
CO 9 divide onto 3 needles and join into round
Round 1: KFB all (18)
Round 2: K all
Round 3: (KFB, K1)* Repeat till end (27)
Round 4: K all
Round 5: (KFB, K2)* Repeat till end (36)
Round 6-12: K all (7 rounds)
Round 13: (K2tog, then K till last 2 stitches on needle K2tog)* Repeat on each needle
Round 14-15: K all (start stuffing as you go)
Round 16-24: Repeat rounds 13-15 x3
Round 25: K2tog all
Round 26-27: K all
Round 28: K2tog all
Cut a yarn tail and pull yarn through remaining 3 stitches and weave ends in.

100 Sales WOOO!

I'm super excited to say that I finally reached my goal of 100 sales! To celebrate and thank everyone I'm holding a big sale in the shop for a short time. By using the coupon code "BIGSALE13" you'll receive 25% off your order. *Doesn't apply to custom orders or clubs* So if you happened to have your eye on something now is the time to get it. The sale is going on till March 3, 2013 so don't miss out.  :)

Sunday, February 24, 2013

Sakura Bath and Body Scrubs


I'm always on a mission to find unique items, specifically those on Etsy. I've since reached the point where just about everything I purchase is either handmade or from a small business. It couldn't make me happier to support such lovely people and products. Over the past few months I've been on a sugar scrub craze. In my mind they're an essential bathroom product. All the scrubs I've tried have been amazing. Leaving me smelling yummy and feeling silky smooth. Truth be told I'm a bit lazy when it comes to lotion. So having a sugar scrub that not only smells good, but exfoliates and moisturizes is perfect for me. For a bit of time I've been looking for a scrub that was a mix of a floral and fruity scent. I ended up coming across Sakura Bath and Body by chance and decided to try out a few samples of their scrub. The 3 scrubs I was able to narrow it down to were Secret Garden, Wonderland, and Polynesian Paradise. All of them smell amazing! Each sample weighs about 2 oz and from my estimate will each last 5 showers. They even sent along an adorable sample of their vanilla cream perfume, which instantly makes me think of baking.
Polynesian Paradise:
Sakura Bath and Body describes Polynesian Paradise as "a unique fusion of pink grapefruit, pineapple, green apple, mango and a touch of moss to round it out!" This scrub has a wonderful sweet balance to it. Typically scents that intend to be sweet become over powering, but not this one. The overall smell reminds me of a fruit smoothie with the light moss scent to mellow out the fruits. 
Wonderland:
"Top notes of luscious strawberry, wild goji berries and ripe raspberry mingle with soft gardenia petals, frosted jasmine, and peach nectar. White amber, coconut musk, and creamy vanilla round out this soft, dreamy scent."So far wonderland is my favorite. It has an overall romantically sweet smell with light floral undertones. Just the right combination of fruit and floral scents. As you can probably tell from the picture I've already started using Wonderland. :)
Secret Garden
"With top notes of Raspberries and Peaches, this blend is toned down by the white notes of Magnolias, Lilies and Cyclamen. Not one to let a fragrance fall flat in the bottom notes, Secret Garden also has White Musk as a supporting dry down." Another lovely scent once again. Secret garden has a stronger floral scent with faint undertones of peaches.
 
Overall Wonderland was my favorite of the 3 as it was right in the middle. Polynesian Paradise held a stronger focus of sweet fruity notes, while Secret Garden was more floral. In the end Wonderland was a combination of the sweet fruity notes found in Polynesian Paradise and the mellow floral notes of Secret Garden. After using the scrub it left my skin pleasantly silky and with a mild remnants of the scrubs scent. So go and check out the other wonderful creations of Sakura Bath and Body.


Saturday, February 23, 2013

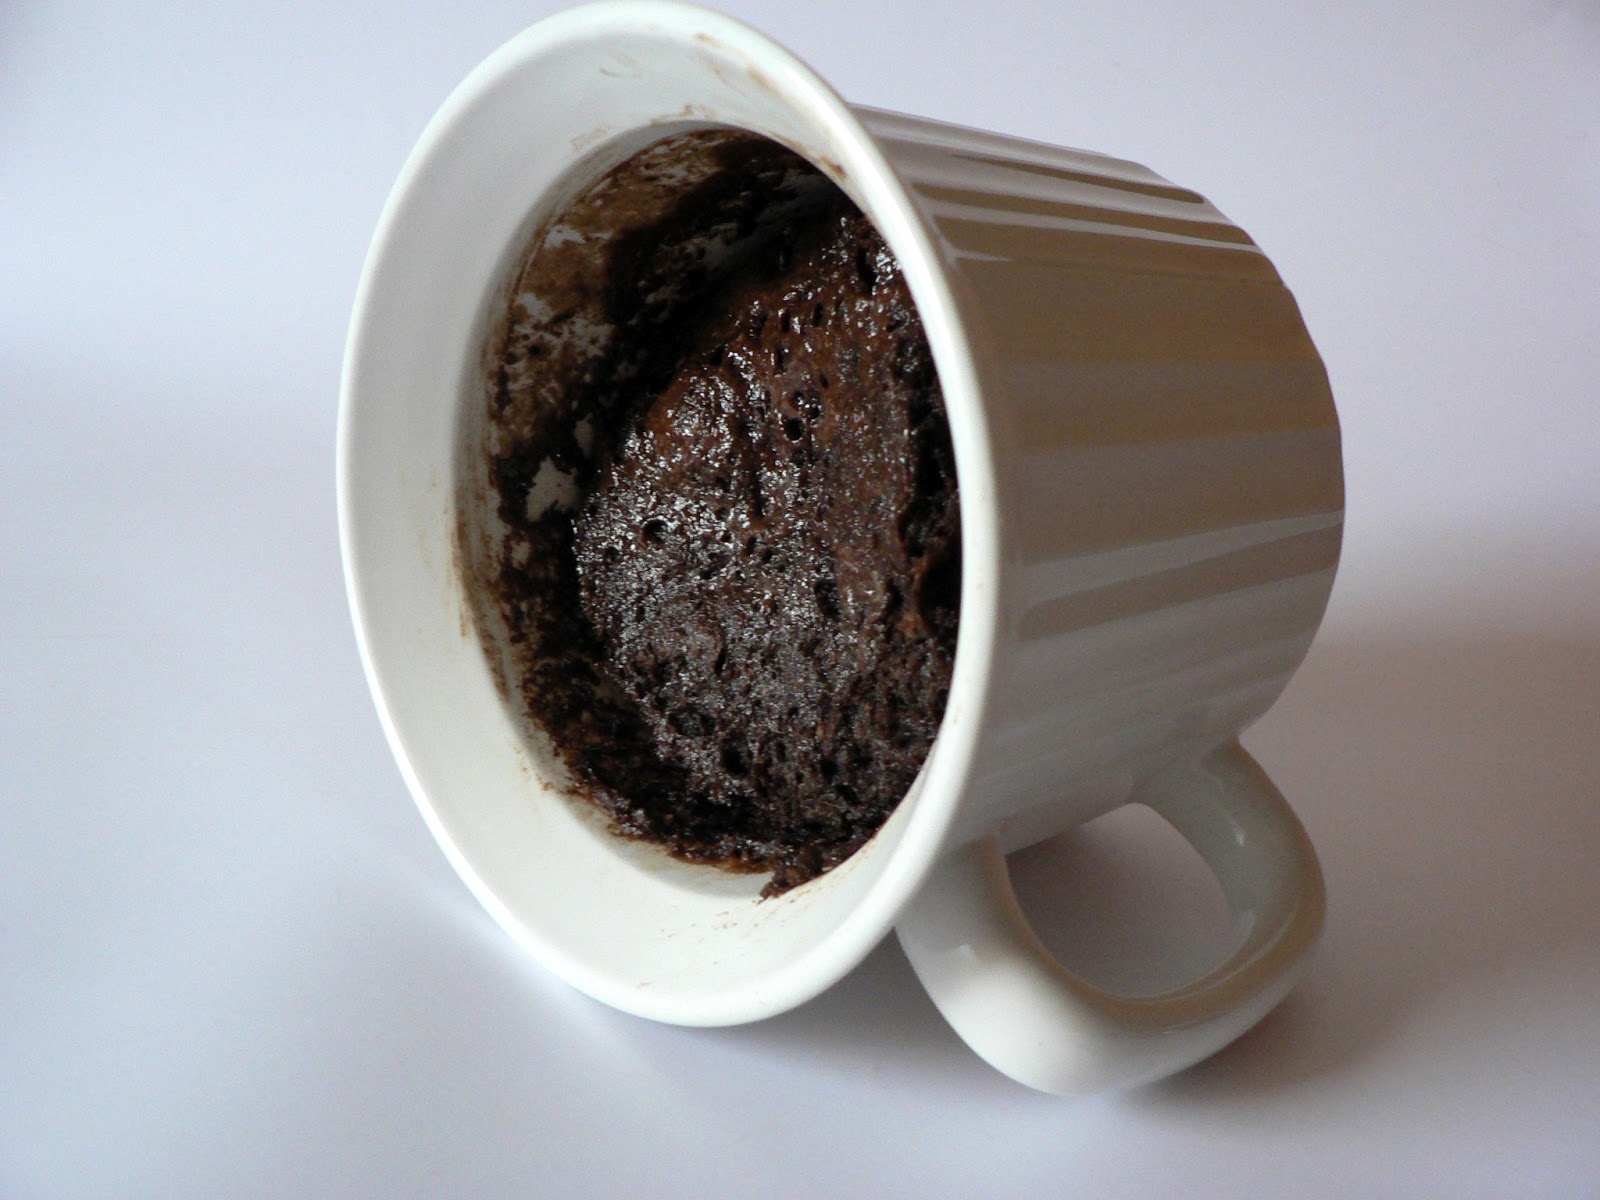
Nutella Mug Cake

For awhile now I've been trying all sorts of mug cakes and cookies in a mug just to satisfy my occasional sweet tooth. Though none were truly that satisfying. They either had a bland taste or would have the consistence of a sponge, yuck! After a bit of searching I came across a recipe that looked yummy, but needed a bit of adjusting to fit my needs. Some testing and plenty of tasting later I've found a wonderful and quick sweet fix, a nutella mug cake. The cake is soft and creates a gooey nutella pudding at the bottom.

 
Nutella Mug Cake Recipe
Serves 1
Takes under 5 minutes
  • 1 Large mug
  • 1 egg white
  • 2 Tb flour
  • 2 Tb sugar
  • 1 1/2 Tb cocoa
  • 1 1/2 Tb milk
  • 1 1/2 Tb vegetable oil
  • 1/4 ts salt
  • 1/4 ts baking powder
  • 1/4 ts vanilla
  • 1 Tb Nutella
 
  1. Place the listed ingredients into a large mug.
  2. Mix ingredients together till smooth.
  3. Place mug and contents into microwave and cook for around 1 minute 20 seconds. Contents will be hot and a bit gooey at the bottom.

Friday, July 6, 2012

Healthier and Delicious Pizza?

This is a personally recipe for pizza that I use all the time! It's delicious and healthier for you due to the whole wheat flour. I know whole wheat flour can rub people's palettes the wrong way, but I swear you won't even notice that there's any there. I'll even admit that I'm a picker eater and I can't tell that there's any there. Anything that has a funny texture or after taste I'll stay a mile away from, but this recipe is so yummy I have to keep myself from eating it multiple times in one day. So please enjoy :)

Pizza Dough Ingredients:

  • 1 1/3 cups warm water
  • 1 tsp sugar
  • 2 tsp salt
  • 2 Tbsp olive oil
  • 2 cups bread flour
  • 2 cups whole wheat pastry flour
  • 2 1/4 tsp yeast
I know you must be thinking why whole wheat pastry flour? I choose whole wheat pastry flour since it has been finely ground removing the chance of the pizza dough having a gritty texture. I also like my pizza rolled out super thin and the low gluten content in pastry flour allows me to easily roll out the dough without it shrinking. I also don't let the dough rise mainly because I like thin pizza, but mainly because when someone wants pizza they'd much rather have it now :)

Honestly I usually just throw all of these ingredients into my bread maker and just let that do the work while I get everything set up. A standard mixer will work just as well. 

While you're waiting for the dough to come together set your oven to 475 degrees F, oil up a pan of your choice, flour a surface and rolling pin, and get your toppings. 

Once the dough is done roll it out on a floured counter to your desired size and thickness. Place on the oiled pan and slather on your tomato sauce of choice. Don't put any cheese on yet. It'll burn and the sauce won't cook down to deliciousness. 

Place the pizza in the oven for about 8 minutes or until the edges start to lightly brown. At that point pull it out and put your toppings of choice on. Place back in the oven for 3-5 minutes or until the cheese starts to slightly brown. Pull the pizza out, cut it up, and enjoy. 

For my pizza I decided to put on some basic cheese, fresh basil, and some white truffle oil. YUM! Mine did get a little burnt, but still oh so delicious. So please enjoy! :)

Tuesday, June 12, 2012

Tour de Fleece and Ravelympics

In the following weeks I'll be "training" myself for the Tour de Fleece and Ravelympics, both of which have been inspired then converted into fiber/yarn games. These events are held on a yarn/fiber base community known as Ravelry. With both of these events they are intended to represent Tour de France and the Olympics. With Tour de Fleece it is intended for those whole spin yarn along side with the Tour de France during June 30th to July 22nd. And the Ravelympics is mainly for just reaching your own goals with either knitting or crocheting from July 27 to August 12. More or less these events are to challenge yourself, just like the events they are based off of.

For Tour de Fleece my main objective is to learn more techniques for spinning yarn. Currently I've been limited to only one basic technique, but I intend to change that. I also might give plying a try, though I do like the look of single plyed yarn trying something new will be great. What I really want to do the most though is to create a super bulky yarn that I can use for the Ravelympics. The orifice on my spinning wheel is only about 1/3 of an inch big, but if I can't do it on my spinning wheel then my drop spindle will have to take the over. And with that yarn I'd love to knit up a massive soft blanket like this. I just can't resist how comfy it looks! Plus I realized it was borderline impossible to find a super bulky single ply yarn, preferably one without acrylic. So maybe it'll be something to consider in the shop. But that's definitely my main goal for this overall. 

And in all of this excitement I'm having a 10% off the shop with the coupon RAVELRY12 at the shop. This applies to everything in the shop so please enjoy! :)

Tuesday, May 15, 2012

Knitting Small Toys Tips from Tails&Snouts


Have you been knitting for awhile, but have been stuck in a rut of knitting the everyday scarves and hats? For awhile that's where I was. Knitting hat after hat until one day hats became so routine that I threw down my needles and proclaimed "no more hats for me!" So I've decided to compile some of my knitting toys tips.

I can't make the claim that I've been knitting toys forever, but I have been spending a large portion of my time learning new methods of knitting and discovering new items to create. First of all if you're first learning how to knit toys start off with flat knit patterns. This way you're simply knitting back and forth on two needles. Once you get good at flat knits you can begin to think about knitting in rounds, which can be more complicated for people due to the increase in needles as well as the fact that most knit toys are small. Since most knit items are smaller items they usually require smaller needles, I always use size 5 bamboo double pointed needles. Bamboo needles are best in my opinion due to their ability to grip the yarn being used and lower the change that a stitch may slip. When it comes to the yarn it may be a personal preference, but it's best to use worsted yarns with knit toys. personally I enjoy using Lion Brand's superwash cashmerino yarn as well as Paton's bamboo silk yarn. Both being smooth and soft, which is best for a knit toy. Also with knit toys, whether you're knitting in a round or knitting flat, you do not need to block it since the item will later be stuffed. Always when it comes to the point of the stuffing, don't over stuff. If the stitches start to pull away and you can see the stuffing through the yarn then you are most likely over stuffing or using the wrong sized needles or yarn for your cute little toy. If you want a toy to be larger or smaller without adjusting the pattern just increase/decrease the needle and yarn size. Bigger needles with thicker yarn will lead to larger tos, while smaller needles and thinner yarn will lead to smaller toys. after awhile you may be able to figure out how to switch a flat knit to a round knit, like I've done with knitting patterns before. In some cases to create a round knit all that must be done is the joining of the stitches into a round, which may not work in all cases or with all patterns. Just be aware that knitting small toys can get frustrating, you may even have to take it apart and knit it all over again. I've done that countless times. But I have never found more satisfaction in knitting then when I comply a little knit toy.

If you'd like any specific tips and advice feel free to post a comment :)


Saturday, May 12, 2012

How to Dye Yarn

Now that I'm on summer break I finally have time to work on the blog. So I decided it would be a fun idea to give a little how to on dyeing yarn.
What you'll need:

  •     Water
  • Vinegar
  • saran wrap 
  • Acid dyes of your choice
  • yarn to dye
  • plastic cups
  • paint brushes
  • Small bowl that isn't used for food (microwavable) 
  • Large bowl to soak yarn in
  • Gloves (unless you want multicolored hands)
  • Either a table you don't mind getting dyed or an old towel and a large piece of cardboard
  • Mesh bags optional if you want to throw yarn into spin cycle 
First start off by soaking the yarn in a water vinegar mix for about 5-10 minutes. Enough time so that the yarn has absorbed as much of the liquid as it can. If the yarn is not given enough time it will have dry spots where the dye will not be absorbed, leaving white spots. Once the yarn has been soaking for awhile remove from the bowl and allow the excess liquid to drain out of the yarn. 


As the yarn drains set up your area. For me I first laid down my large piece of cardboard then placed my old towel over it. Then placed a large sheet of saran warp to place the yarn on. 


With the yarn placed on top of the saran warp have your acid dye prepared. To prepare the acid dye just place a small amount in the bottom of the plastic cup and add water. Now you can start to dye/paint your yarn, but don't forget your gloves. You can paint your yarn any color or in any pattern you want.  For this yarn I was doing different shades of one color by adding more water to the dye as I painted. Don't forget to paint both sides of the yarn. 


Once you've completed your painting it's time to wrap your yarn. Take both long sides of the saran wrap and fold it on top of the yarn. Next take the short ends and fold those in. 


Next roll the saran wrapped yarn into a roll.


Placed the rolled yarn into the "no food" microwavable bowl and put into the microwave for 1 minute. Once the minute is up let it rest for another minute. Then put the yarn in for 1 more minute. After that take the yarn to the sink and let it rest for a bit. Then carefully, with water running, remove the yarn from the saran wrap. The yarn may be extremely hot so be careful not to get burnt. Once the yarn is out of the saran wrap rise the yarn till the water runs clear. 


Lastly find a place to hang the yarn where it can dry. Once the yarn is finished drying you get to become the proud creator of your own hand dyed yarn. 

I swear acid dyes aren't that scary

I personally love acid dyes, but I hear so many people say that they're terrified of them. I swear that they're not as scary as you think, but if you still feel that way just stick with kool aid dyeing. The reason that so many people find acid dyes so scary, in my mind at least, is due to the fact that acid dyes can not be used in anything that may be used for food or cooking. Which is a valid reason to avoid using them, but there are solutions to this. I actually use either old paint brush when I dye, when are those every going to come in contact with food, or an old crock pot. Typically I either use the crock pot for single color dyeing or to soak the fiber with vinegar in. That's also the reason why it's called acid dye, vinegar is used to set the dye into place. Acid dyes also provide a wide array of different colors where you can have more control over the intensity of the color. While I've found with kool aid dyeing that it produces a more pastel effect, which can be the exact color you had in mind. If you would like to use acid dyes I'd go with Jacquard acid dyes. I've tried a few others where the colors appear nice, but either have a coarse texture or don't produce as intense of a color.

Sunday, April 29, 2012

Zoo Borns


Since this winter has been so mild the chances or there being wildlife orphans are low, thankfully. It's also the reason why we've only managed to get 1 foster kitten. (little Bengal from a previous post) Instead I decided to share one of my favorite cute fixes, ZooBorns. It's a website that shows and informs you about all of the newest zoo babies. From the small to the large and the scaled to the furred and all things in between.

Friday, April 27, 2012

Foster Kitten Cuteness

So a few weeks ago we got this cute little girly. Apparently a new Bengal breeder's cat had a litter of kittens who ended up rejecting them. Sadly the one that we received was the only one to survive thus came her name Gracie. Little Gracie had a rough beginning, making us question if she was going to be alright. But she's almost a month old and quite a loud little girl. Not to mention always hungry. After each feeding she transforms into a bowling ball with spots and still she asks for more. I guess she's just trying to make up for her rough start. :)

Thursday, April 26, 2012

New Website

A few months ago I was lucky enough to become a part of a pretty great deal. A new and upcoming online boutique/website host was having the deal that if you sign up you get a free website for life. Yepper, that's right for as long as I live I'll have a fancy pancy website. Now who could argue with that?

Anyways I've been working on it on and off as of lately and have finally gotten most of it done. Here's the link: Supadupa Tails&Snouts Shop


Sunday, April 22, 2012

Dryer Balls


As I was doing my spring cleaning I came across random little bits of wool yarn. None of which contained enough yarn to really knit anything sufficient with. At that time I recalled seeing a "how to" on making dryer balls  so I decided to give it a try. All dryer balls really are are felted wool balls, that's really it and essential oils if you want. I ended up making a few batches of them and decided to keep the funny ones for myself. But dryer balls are rather helpful. With dryer balls your laundry will come out softer and faster than any dryer sheet could do. Dryer balls have been shown to reduce static, make laundry softer, and cut back on dryer time. And less dryer time means less energy used, saving you money. 

New Wild Things